Here are installation instructions for the following parts:
Angel Vent hood scoops:
Angel Fender Vents:
"Slide & Lock" Fender Vents:
Angel Vent bolt-on headlight covers:
How to install the "Angel Vent" hood scoops & "STM" hood vent - part #s AV1001, AV2001, & STM14001.
1) Make a template of the outer dimensions. Poster paper works best but cardboard or paper will work too. Just place the scoop upside down on the paper & trace around it.
2) Place the template on the hood carefully centering & squaring it & with the front edge 8 3/4" back from the front of the hood for part #AV1001; 7 1/2" back for part #AV2001; & 7 1/8" back for #STM14001. Trace around it with a pencil.
3) Cut out the opening being careful to ONLY cut through the skin of the hood (about 1/8").
4) Turn the hood over & take a gasket scraper type chisel & separate the skin from the inner structure so that you can remove the cut-out piece.
5) Cut the inner structure by lowering the scoop into the hole & cutting to fit tightly against the sides of the scoop.
6) Using the cut-out piece, make bonding strips at least 2" wide to go around the circumference of the hole. They have to overlap both the opening & the scoop at least 1" all the way around.
7) Drill small holes every 3" or so around the opening in the hood & the scoop 1/2" from the edges.
8) Place the bonding strips under the opening & screw through the holes pulling the bonding strips up tight. Place the scoop in the hole & do the same with it.
9) Remove the scoop & bonding strips & grind all contact surfaces (bottom of hood & scoop & top of bonding strips - & don't forget to do the bottom where you'll be molding in the inner structure to the scoop) with a 24 grit disc.
10) After blowing off all the dust ;-) mix up your 'Vette panel adhesive/filler & spread it on the bonding strips & screw them in place, then screw the scoop in place. Work fast so that the adhesive doesn't set up before you get the strips & scoop pulled down tight. The adhesive should squeeze out all around the edges.
11) Go back under the hood & add the adhesive/filler all around the edges of the inner structure where it meets the scoop. If you want a little more reinforcement, chop up a little fiberglass mat with some scissors & mix it in with the adhesive before you mix in the hardener.
12) After that dries completely, grind out a "V" all around the seam & the screw holes using the same 24 grit. Fill with the 'Vette shtuff.
13) Sand smooth with blocks &/or paint paddles. Usually you start with 40 grit, go to 80 grit, & do a little final smoothing with 180.
14) Prime & block as you would any bodywork. Re-prime & you're ready to sand & shoot the paint.
15) For Part #AV1001, before bolting the hood back on, cut the sheetmetal in front of spare 2" x 20" & relocate the overflow tank.
16) Drive & enjoy your new cool looking hood vent knowing the front end won't float & headlight doors won't pop up when you meet a huge truck on a two-lane. ;-)
To save this text file for printing right click & choose "save as". Printable text file.
Back to top of page.
How to install the "Angel Fender Vents" - part # AFV5001.
1) Remove the fender from the car. If you don't want to remove the rocker (they can be a real pain) you may get away with just removing the upper bolts (and inner fender) & carefully lean out the fender to work behind it.
2) Using the template, mark & cut out the opening. If you don't have the template you can download it here. Right-click & choose "save as". Angel Fender Vents template.
3) SLOWLY grind the back of the fender with a 24 grit disc. Grind slowly so as to not heat up & melt the plastic (doing so will prevent the adhesive from bonding). Grind the front of the vent around the area where it contacts the back of the fender.
4) After test fitting, Bond the vent behind the fender using SEM (brand name) SEM-Weld #39708 or equivalent. Use a product made for RRIM. Clamp the vent tight while it sets up.
5) Grind around the hole where the fender meets the vent, & blend in with the SEM-Weld.
6) Prime & block/finish as you would any body work. To make the vent fully functional, cut a hole in the side sheetmetal behind the headlights, or cut holes through the "trunk" area & run a ducting hose.
7) Drive & enjoy the cool look of the vents knowing - if you cut the metal for function - that more air will flow from the area behind the radiator & less under the car causing lift. ;-)
To save this text file for printing right click & choose "save as". Printable text file.
Back to top of page.
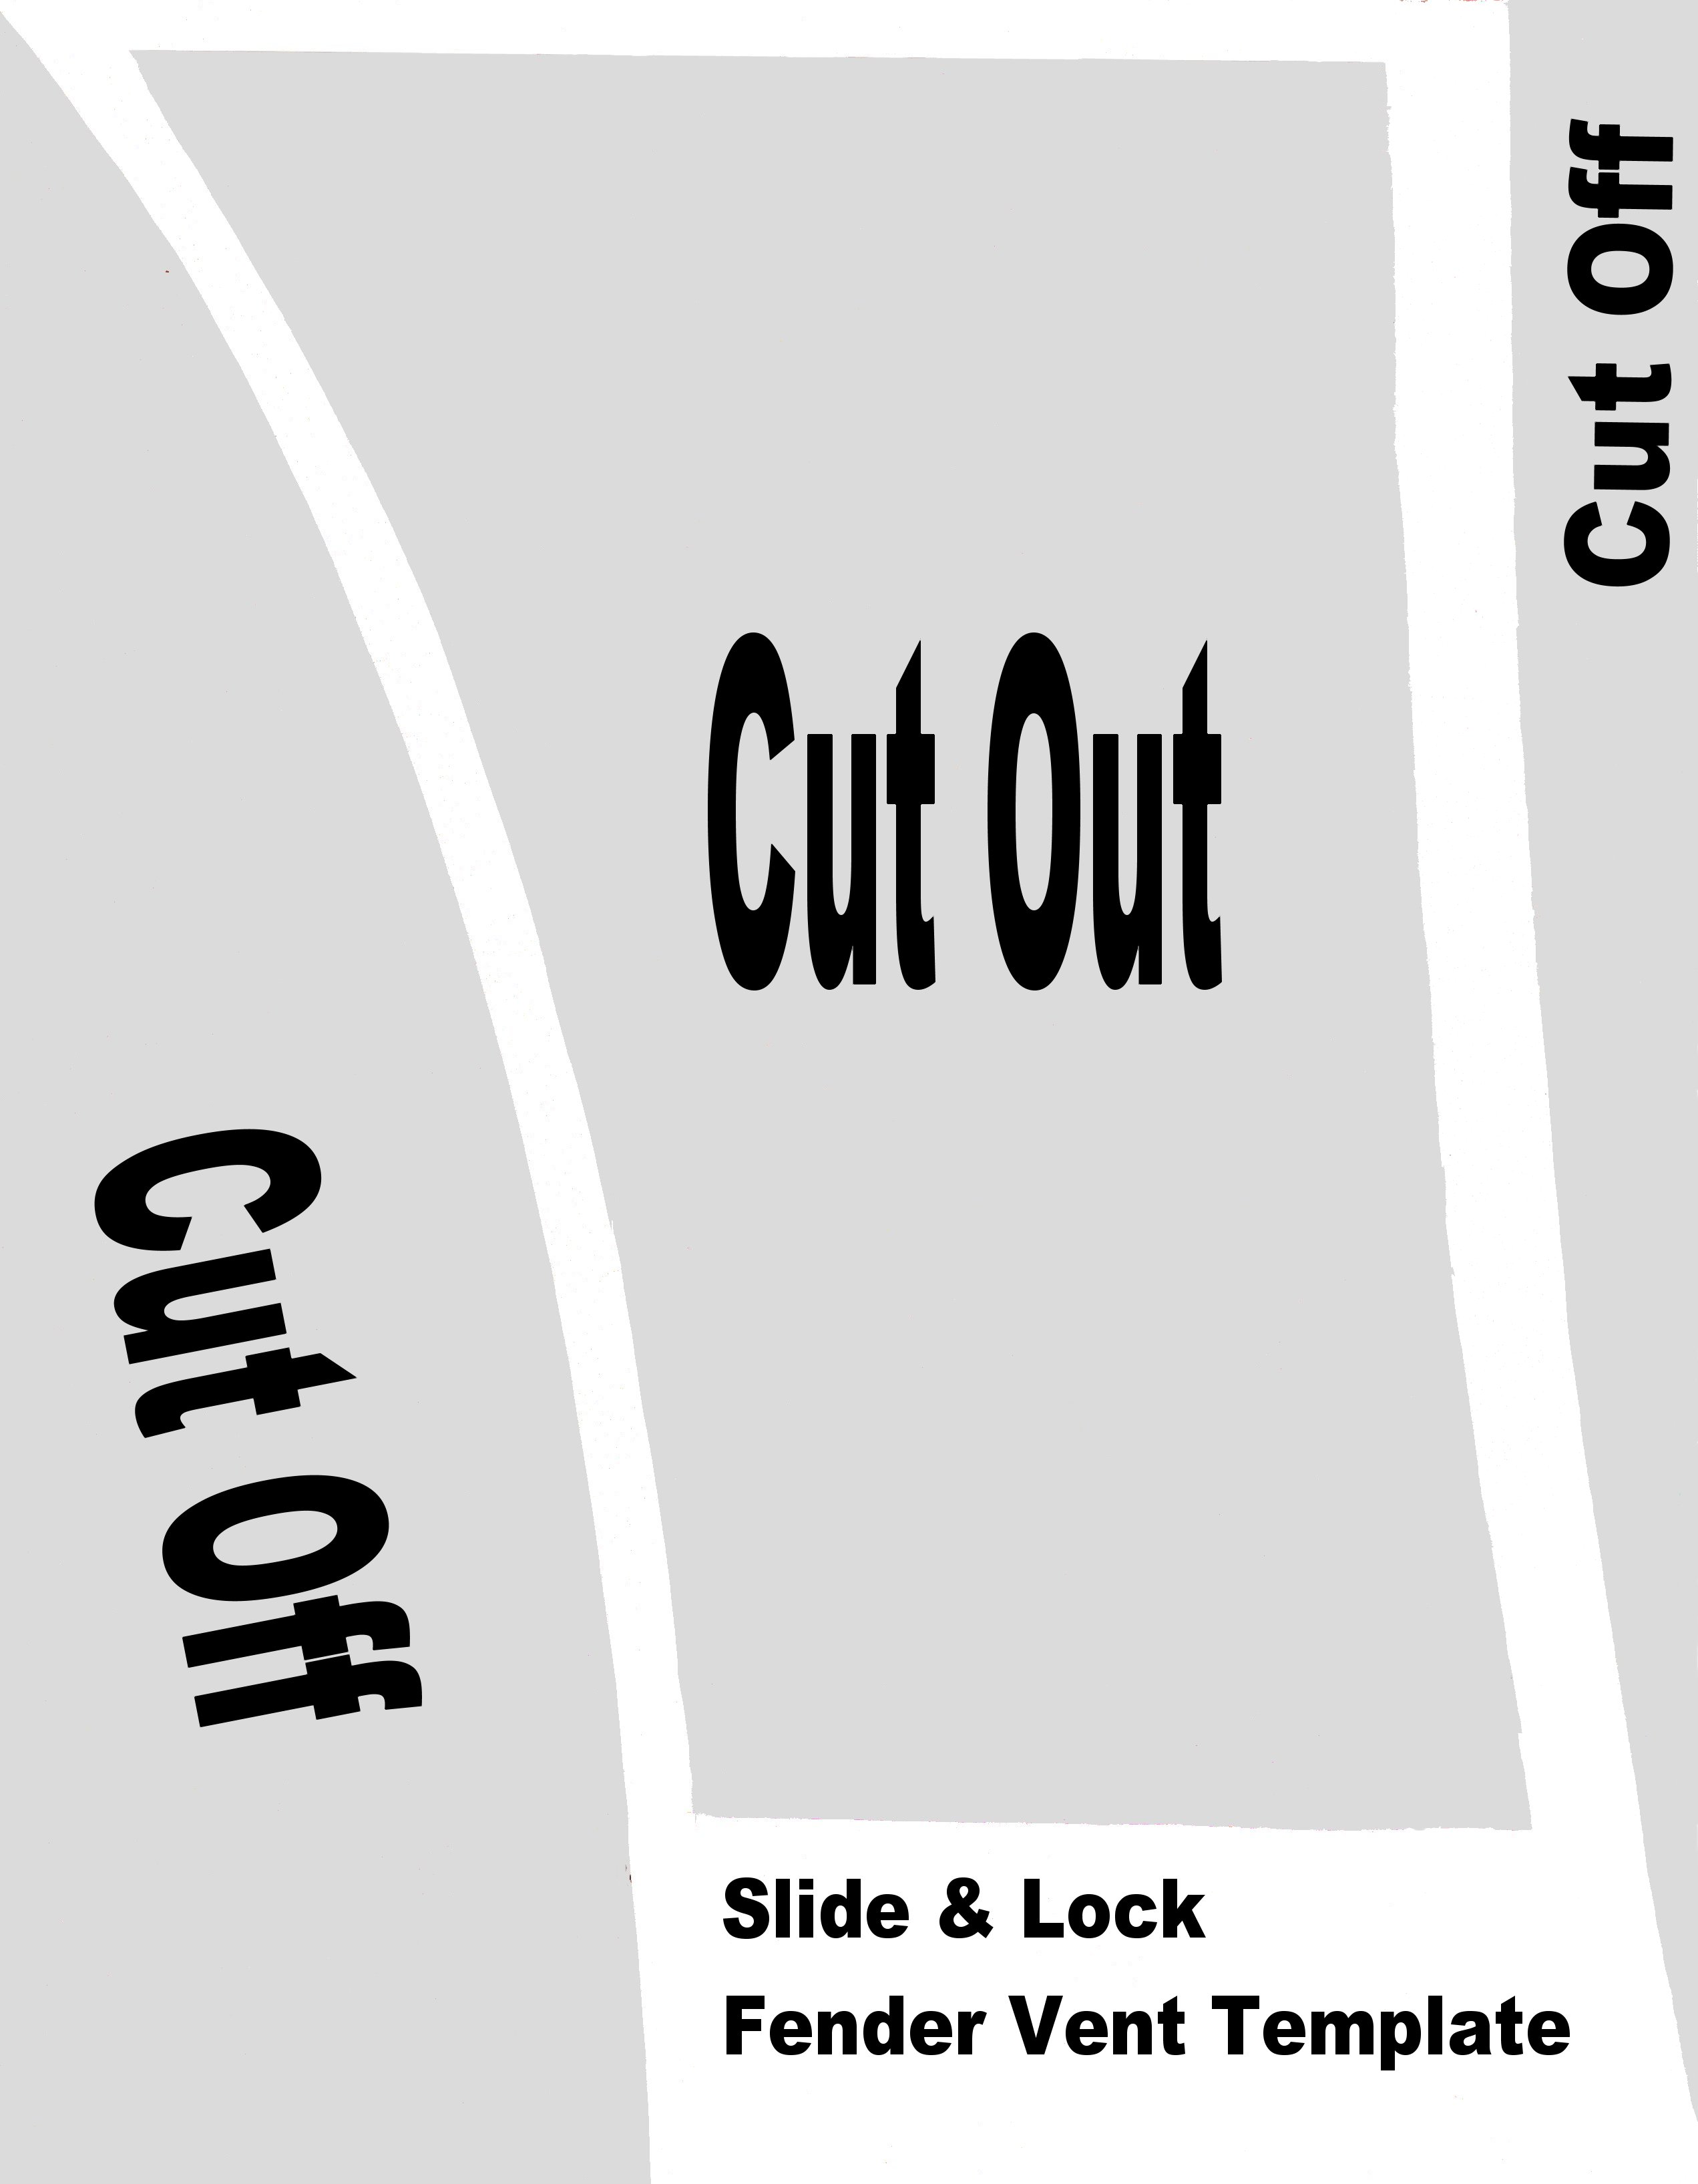
How to install the "Slide & Lock Fender Vents" - part # AFV5002.
1) Remove the fender from the car. If you don't want to remove the rocker (they can be a real pain) you may get away with just removing the inner fender for access.
2) Remove the side molding.
3) Using the "Slide & Lock" template, mark & cut out the opening. If you don't have the template, you can download it here. Right click & choose "save as". Slide & Lock Fender Vents template.
4) Test fit the vent & opening by sliding the upper flange of the vent into place, then slide the vent down to engage the lower flange.
5) Using the piece you cut from the fender, cut a strip 4 1/2" x 1/2" & slide it behind the upper flange to take out the slack & "lock" it in place.
6) Once everything is test fitted, pull the vent off & apply glue around the perimerter & into the flanges. Any good epoxy glue should work. Install the vent & glue in the "locking strip". Tape the sides until the glue dries to hold the vent tight against the fender.
7) Prime & paint as you would any fiberglass part. To make the vent fully functional, cut a hole in the side sheetmetal behind the headlights, or cut holes through the "trunk" area & run a ducting hose. 8) Reinstall the side molding & fender or inner fender.
To save this text file for printing right click & choose "save as". Printable text file.
Back to top of page.
How to install the bolt-on "Angel Vent Headlight Covers" - part # HC3002.
1) Raise the hood & remove the headlight cover assemblies via the four bolts (two on each side) directly behind the headlight openings.
2) Using a punch, punch in the center of the plastic rivets. Pry out the rivets & remove the cover.
3) Paint the cover as you would any fiberglass part.
4) Cut out the metal bracket to clear the vent.
5) Position the new cover & screw it to the bracket.
6) Re-install the assembly & adjust it so that the gap is equal around the perimeter.
To save this text file for printing right click & choose "save as". Printable text file.
Back to top of page.
MORE COMING SOON!
You can email me at